On this page
Pawanmuktasana has the least appealing name in the library and one of the most useful shapes. Hugging the knees into the belly rounds and releases the lower back, applies gentle pressure to the abdomen, and makes an excellent counter-pose after any backbend. It also does the thing the name describes, which is why it is called that.
What it is
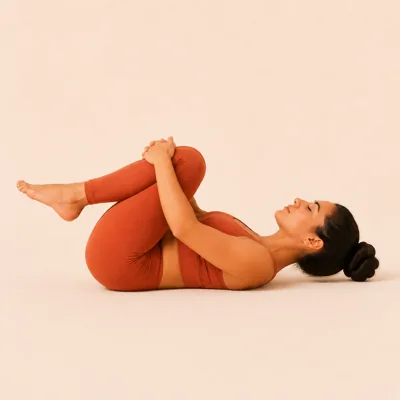
You lie on your back, bend both knees and draw them in toward the chest, wrapping the arms around the shins. The lower back releases into the floor and the head and shoulders stay resting down. Then you breathe steadily and let the belly press into the thighs on the inhale and the knees draw a little closer on the exhale.
The breath does the work rather than the arms. Pulling the knees in hard and holding them there is a static squeeze. Letting each exhale bring them slightly closer and each inhale push gently back turns it into a rhythmic massage of the abdomen, which is what the pose is for.
It is a natural counter-pose after back-bending. Cobra, Locust, Bow, Bridge and Camel all extend the spine; this rounds it in the opposite direction and settles the lower back.
Rocking slowly side to side while holding is an optional addition that massages the lower back directly, and many people find it the most useful part.
How to practise it
-
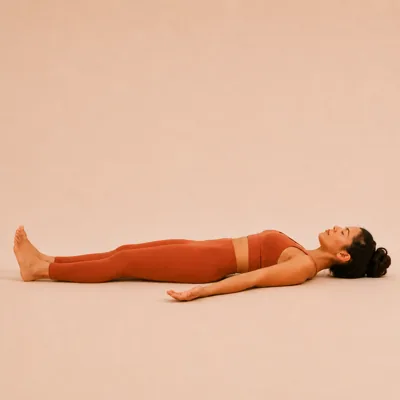
Lie on your back
Lie down on your back with the legs extended and the whole body at ease. Let the shoulders settle and the back of the neck lengthen.
-
Hug the knees in
Bend both knees and draw them in towards the chest, wrapping the arms around the shins. Let the lower back release into the floor and keep the head and shoulders resting down.
-
Breathe and release
Breathe steadily, letting the belly press gently into the thighs on each inhale and the knees draw a little closer on each exhale. You can rock slowly side to side to massage the lower back.
-
Release and lie back down
Slowly release the legs and extend them back down to the floor, returning to a relaxed lying position. Notice the effect of the pose on your lower back before moving on.
How long and how often
A minute or so, or as long as it is comfortable. It is a resting shape rather than a timed one.
Use it after backbends, after seated work, and any time the lower back feels compressed. It also suits the very end of a practice, before Shavasana.
Take one knee at a time if both together is too much, which is a legitimate version rather than a lesser one.
What usually goes wrong
Lifting the head to meet the knees. The head and shoulders stay resting on the floor, which the app says directly. Curling up engages the neck and abdomen and prevents the lower back from releasing.
Holding across the shins with sensitive knees. Hold behind the thighs instead. It is the same pose with the pressure off the knee joint.
Pulling hard and holding. Let the breath move the knees rather than the arms holding them fixed. The rhythm is what makes it a massage rather than a squeeze.
Tensing the shoulders. The shoulders and neck stay relaxed on the floor throughout. Gripping tightly brings them up off the mat.
Who should take care
Practise safely. Hold behind the thighs instead of the shins if the knees are sensitive, and take one knee at a time if both together is too much. Keep the head down rather than lifting it. Ease off if you have a knee, hip, or lower-back injury, or if you are pregnant. See our full Health & Safety Disclaimer.
A minute to release the lower back
PanchPrana places Wind Release naturally after the backbends, where it does the most good. It is one of the 66 techniques that are free to practise in full, with no account needed.


Common questions
Where should I hold?
Around the shins normally, or behind the thighs if the knees are sensitive. Behind the thighs takes all the pressure off the knee joint.
Can I do one knee at a time?
Yes. The app suggests it directly if both together is too much, and it is a perfectly good version of the pose.
Should I lift my head?
No. Keep the head down. Curling up turns it into an abdominal exercise and stops the lower back releasing.
Is the rocking necessary?
It is optional. Rocking slowly side to side massages the lower back and many people find it the best part, but a still hold works too.
When should I use it?
After backbends in particular, and any time the lower back feels compressed. It also works well just before final relaxation.